In case you’re also wondering
Hi everyone.
Yesterday I posted this picture
and I’ve had 2 people ask me why I bothered to separate the straight pins. Well, in case you wondered………… I thought I try to explain.
I did this because I have different pin cushions for all the different types of straight pins that I use. I know it sounds a bit silly, maybe even obsessive, but because I sew and craft using such a variety of fabric, materials and mediums I have found it easier to keep my straight pins separated.
The following information is on the how and why I separate my pins:
These are the old solid colored flat heads
which are NOT heat resistant. They tend to melt so I never use them on things I know I will need to press while leaving the pins in. They also have a tendency for the plastic heads to fall off after repetitive use. When that happens I place them on the misfit pincushion (explained later).
I keep the pins with the round plastic heads in the same pincushion as the flat headed ones because they melt also but I place them on separate sides. I use them when I don’t have to press but need a shorter pin. The round heads don’t seem to fall off but they are my least favorite to use. I can’t really explain why, I just simply don’t care for them. {???}
Quilting straight pins are very similar to the one shown above. They are a bit longer, thick, sturdy and have large round heads but like the shorter ones I don’t care for them so I don’t use them often. There’s nothing wrong with them it’s just a personal preference.
The ones that look like little buttons on top are heat resistant so I use them when I know I’ll need to press as I am sewing. They lay flat against the fabric which is very helpful. They are stronger than the thin glass headed straight pins so I do use them for piecing quilts and for sewing most items other than garment construction. The tops come in a variety of shapes: hearts, flowers, butterflies, etc.
The ones with round glass heads are very sharp and you can buy extra long, extra thin ones, which are the kind I like. They have glass heads so I don’t have to worry about them melting. Because they are so thin they do bend easily so I don’t use them on heavy or thick fabric but I love them when making garments. They glide through the fabric like butter.
The extra long thick ones with large bead heads are hat pin size. The ones I use are 3 inches but they come in different lengths. I find them useful for all sorts of things, sewing and crafts alike.
I have taken some of the hat sized pins and glued letters to the top.

Notice that a few have blank flat beads and a few have hearts glued to the top. I use them when piecing quilts together. The heart is always the top row, then the alphabet ones label the rows in order and the last row is the blank flat bead. I always place these labeling pins on the right hand side of the row so I can also know how to lay them out and don’t flip them upside down in error. It saves me a lot of time and at lot of picking out seams.
I have 3 other types of pins that have there own place in my sewing and craft room:
1. regular straight pins like you find everywhere. The common type that always come in beginner sewing kits. They are inexpensive so I keep a container full of them for use in my classes.
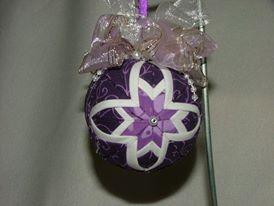
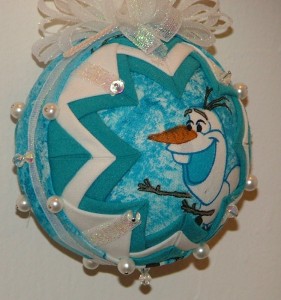
2. Tiny sequin pins.  Of course they are good for sequins and beads but they are very handy when making doll clothes or doing hand applique work. I also use them when making Christmas ornaments such as these.
3. And finally my misc. pin cushion for misfit. pins …………..that’s the one where all the misfits go. Those with loose heads, ones that are bent or damaged go in the misfit pincushion to be used for piercing holes in glue bottles, paint pens, for spreading glue, or for any job that I need a straight pin but don’t want to sacrifice one that is still good. After all………..they cost money!
It may seem like I am very organized but really it wasn’t something I actually planned. I have LOTS of pincushions because they are fun and fast to make so without really thinking about it I starting sticking the different types of pins into different pincushions and it evolved from there. I have found it so helpful I wouldn’t want to change now. Also, I’ve been asked if it’s hard to keep it up. The answer is, NO, not at all because when I’m using one type of pin I already have that pincushion next to the sewing machine so as I pull them out of the fabric I just place them right back into that same pincushion. It’s really very simple and I do it without thinking.
Okay——— so there you have it-another glimpse into my world and the way I do things.
…… thanks for stopping by …..
have a terrific night and ……….sweet dreams everyone!
- Posted by
 admin
admin - Posted in BLOG
 Oct, 30, 2016
 2 Comments.

 1-702-281-4854


What a great lesson! Thanks for a good idea and info on pin useage as well
Thank you for taking the time to write. I enjoy feedback from my readers so much.